Install Plugin
Install the Finexus Payment Gateway Plugin for WooCommerce™ on a WordPress website.
Ensure you have downloaded the WooCommerce plugin before proceeding. Links are provided under Download Plugin.
Step 1 : Add Plugin
Add the plugin file woocommerce-plugin-4.0.5.zip to the merchant's WordPress plugins.

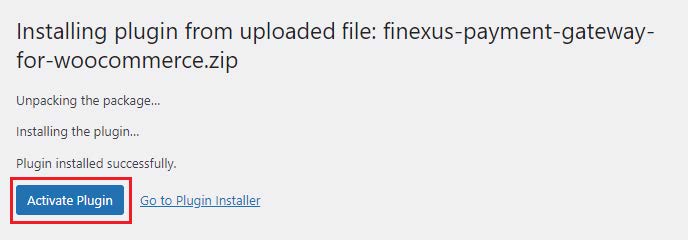
Step 2 : Activate Plugin
Once the plugin is installed, activate it.

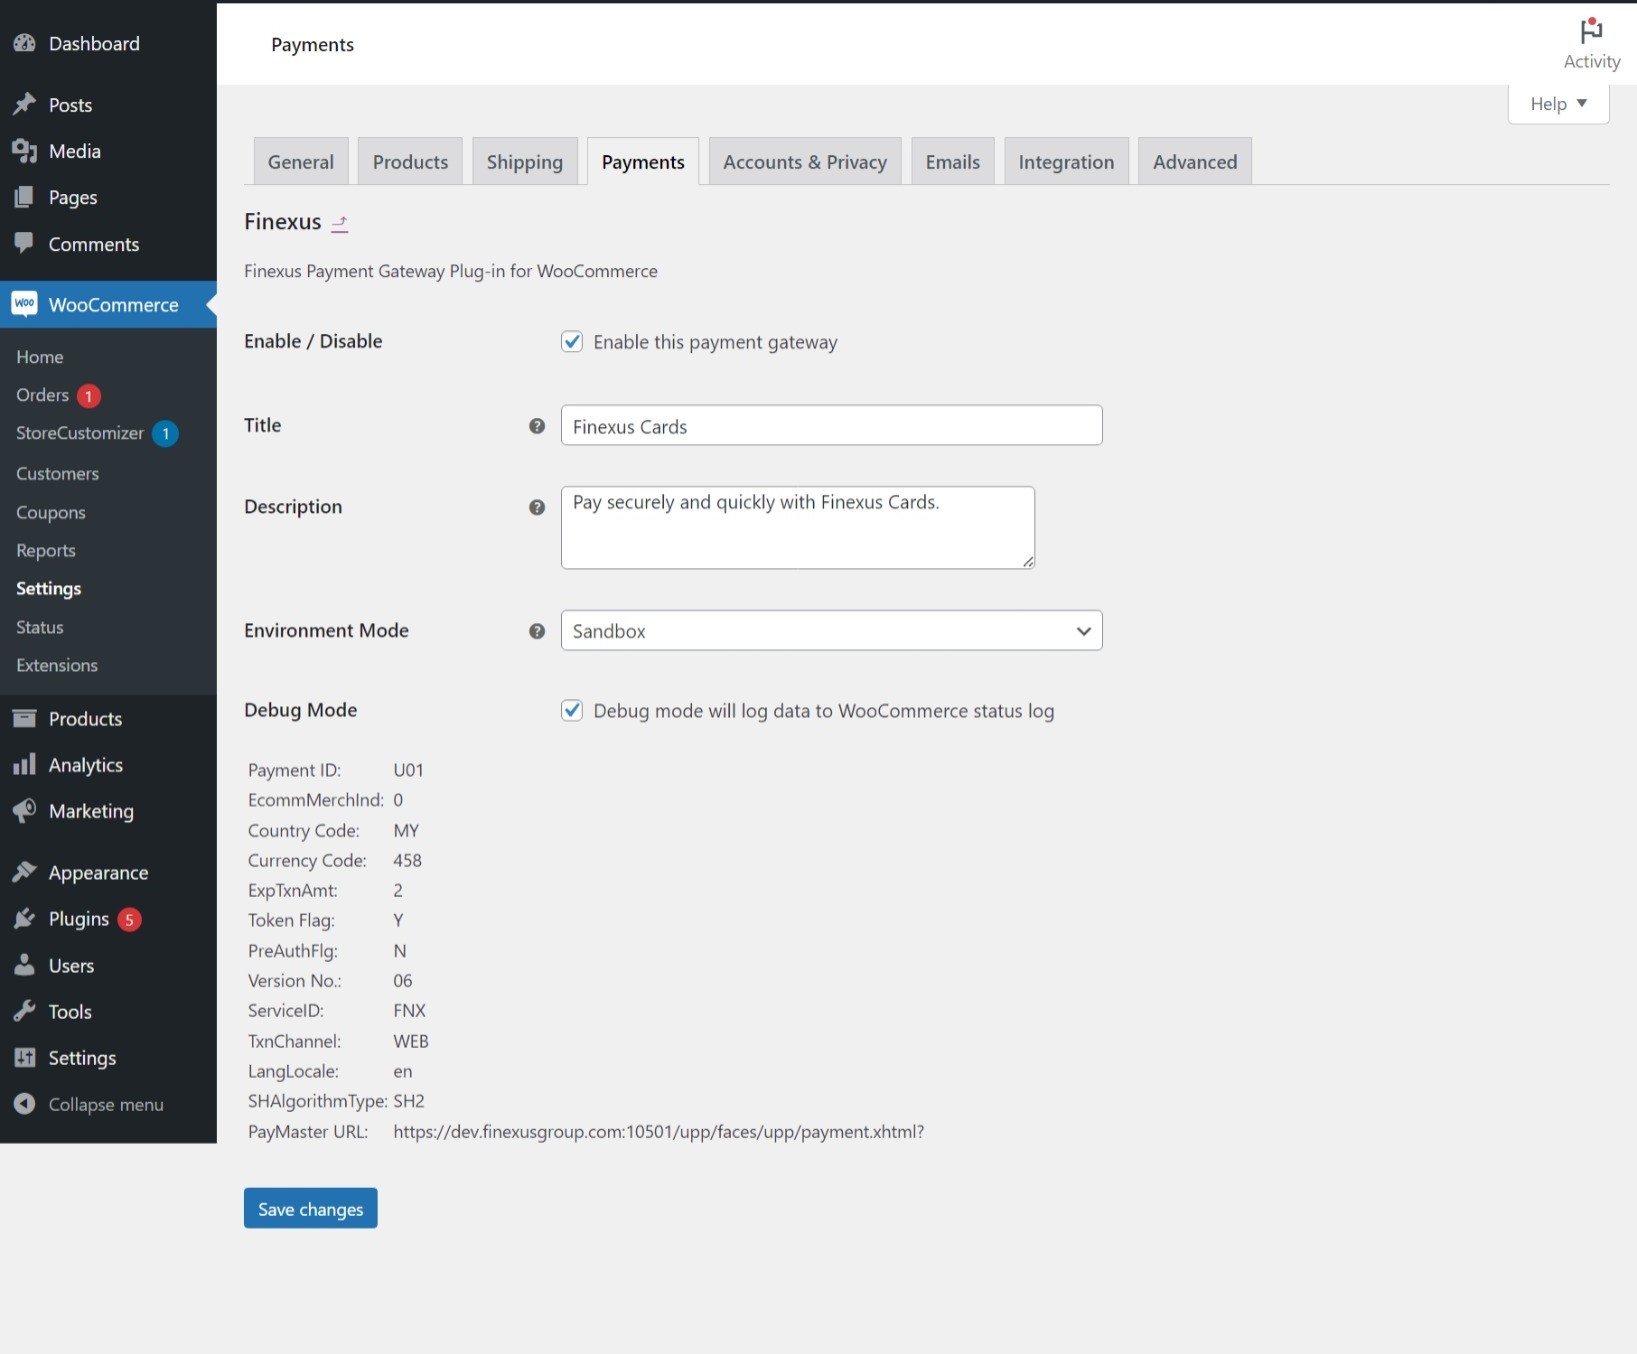
Step 3 : Configure
Configure the merchant’s information for the installed plugin by clicking the Settings link.

Configure the MerchantID and SecretKey in the payment properties file.
For example, the path to the properties file might be:
...\wooCommerce\wp-content\plugins\finexus-payment-gateway-for-woocommerce-V45\src\PayMasterProperties\UPPPayment
Step 4 : Enable Payment Gateway
Enable the Finexus Payment Gateway Plugin for WooCommerce and save your changes.

Enabling or disabling debug mode will affect the debug_log field in the payment properties file, and vice versa.
See table below for an explanation of the fields.
| Field Name | Description |
|---|---|
| Enable / Disable | The flag to indicate whether customer could see the option to pay with PayMaster Payment Gateway during checkout. |
| Environment Mode | The environment mode where this application will be running in either live or production. |
| Debug Mode | The user obtains the logs of all transactions completed through the PayMaster payment gateway. |