Appendix 8
FIDU App
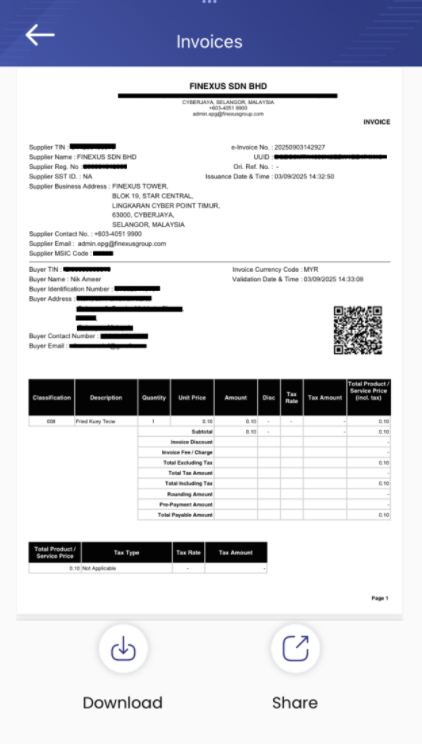
The FIDU mobile app lets customers obtain their validated e-Invoice from the FIDU QR code printed on the receipt by the Kayaaku POS / EDC. This section covers the customer flows to register the FIDU app and scan the QR code to claim an e-Invoice.
Register FIDU App
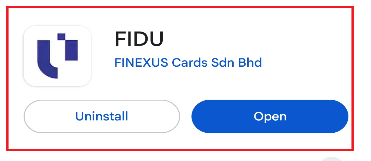
Step 1: Download App
Download the FIDU app from the Apple App Store or Google Play Store.
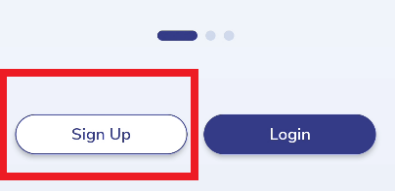
Step 2: Register an Account
Click Sign Up to register an account.
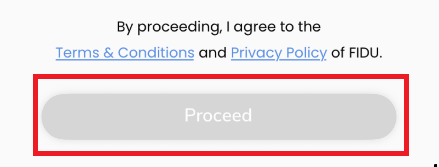
Step 3: Fill In Sign Up Screens
Fill in the fields in the sign-up screens, then press Proceed.
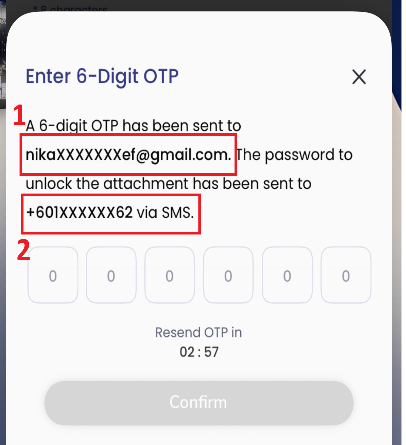
Step 4: Key in Sign-up OTP
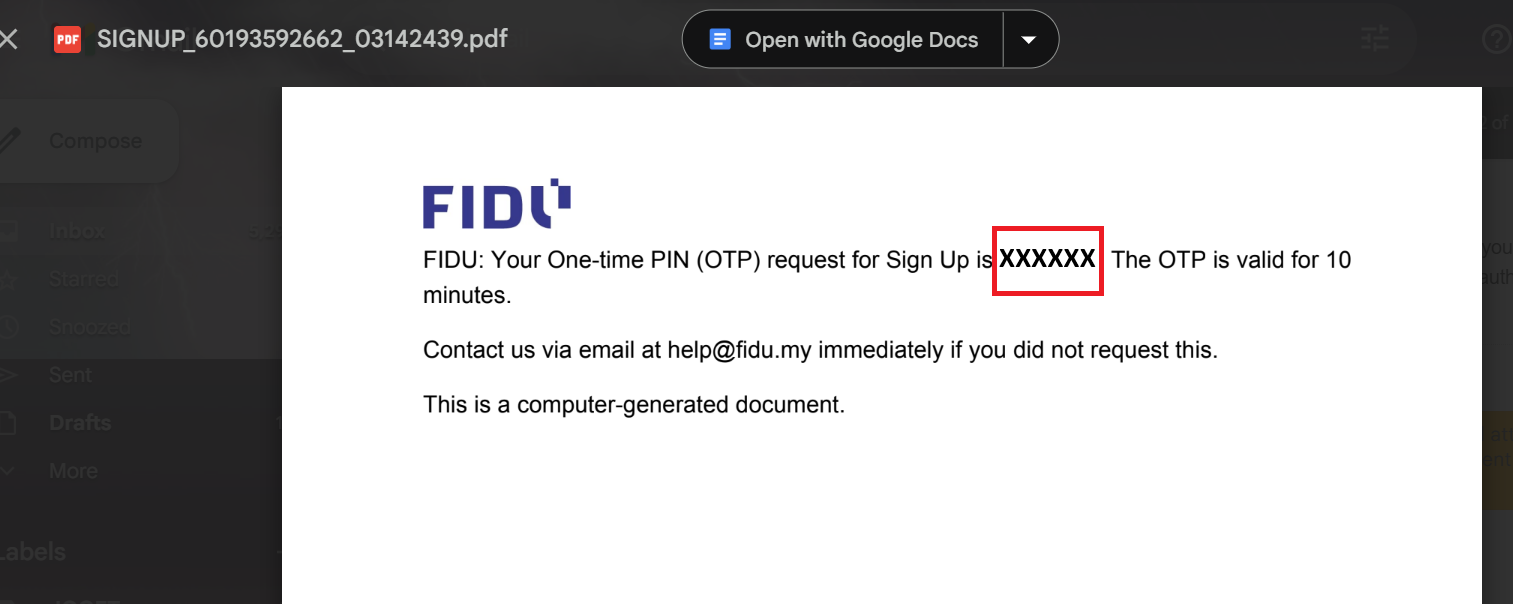
FIDU will ask for a 6-digit OTP to proceed.
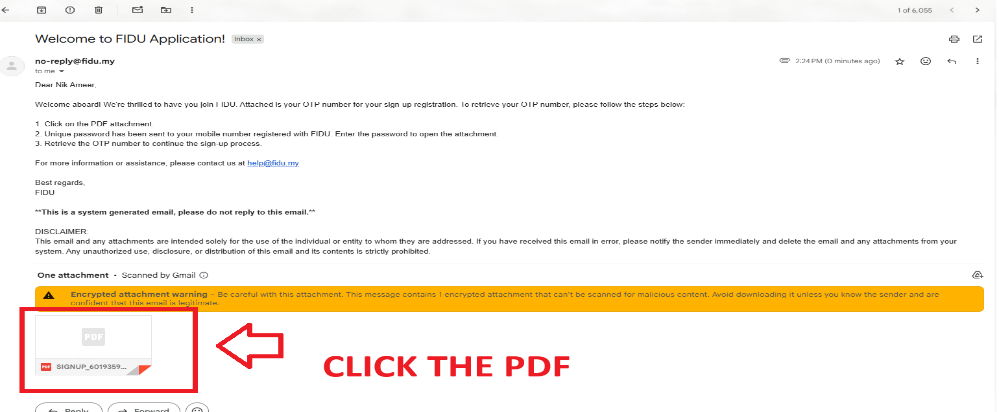
- The 6-digit OTP is sent to the email address provided during sign-up as a PDF file.
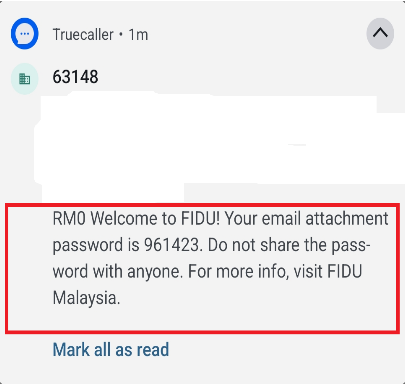
- The PDF is locked with a password. The password is sent via SMS to the mobile number provided during sign-up.
Click the PDF to proceed.
Fill in the password from the SMS.
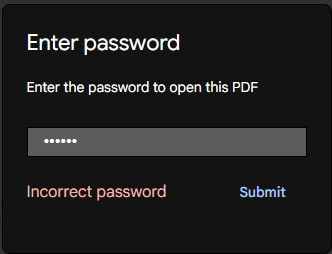
The 6-digit OTP will be shown in the PDF.
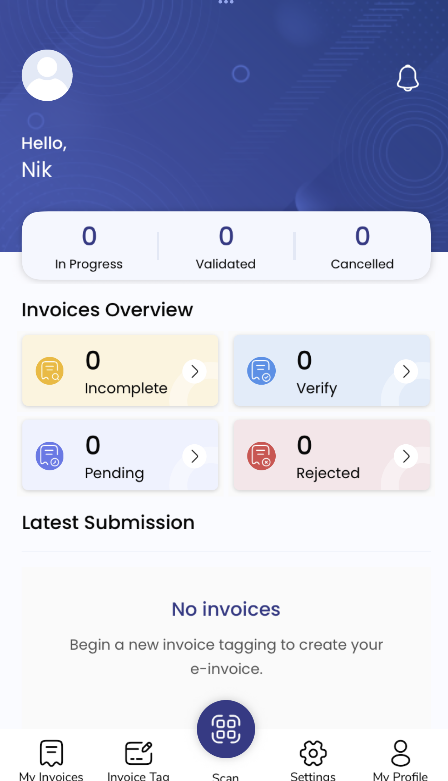
Sign-up is completed and the user will be navigated to the main screen.
Scan FIDU QR to Claim e-Invoice
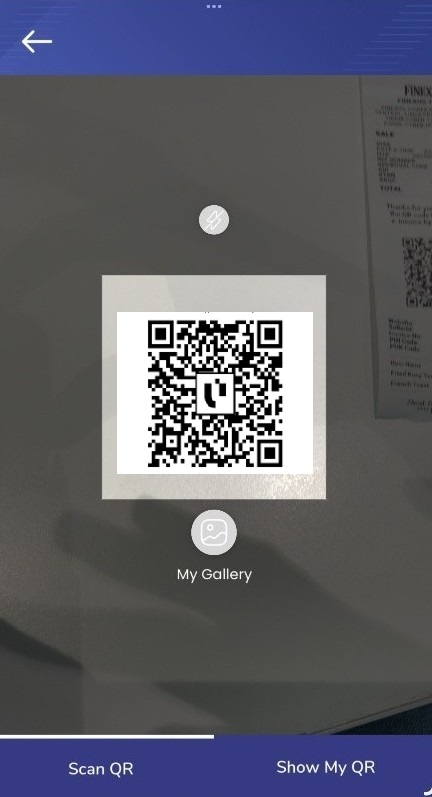
Step 5: Scan Invoice QR
Press the Scan button at the bottom centre of the screen to open the scan view. Scan the FIDU QR on the receipt.

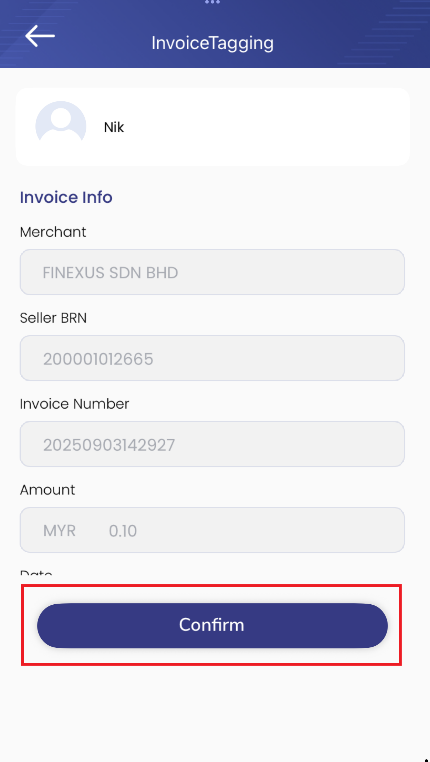
Step 6: Invoice Tagging
Once the QR is scanned, the invoice details will be displayed. Press Confirm to proceed.
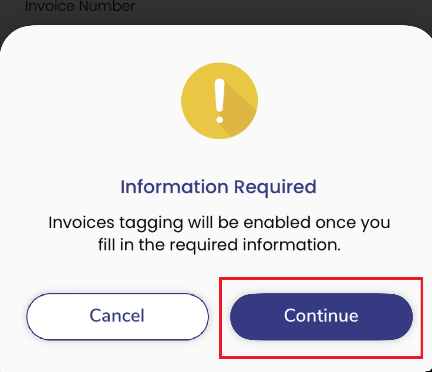
FIDU will ask you to fill out required information to enable invoice tagging. Press Continue.
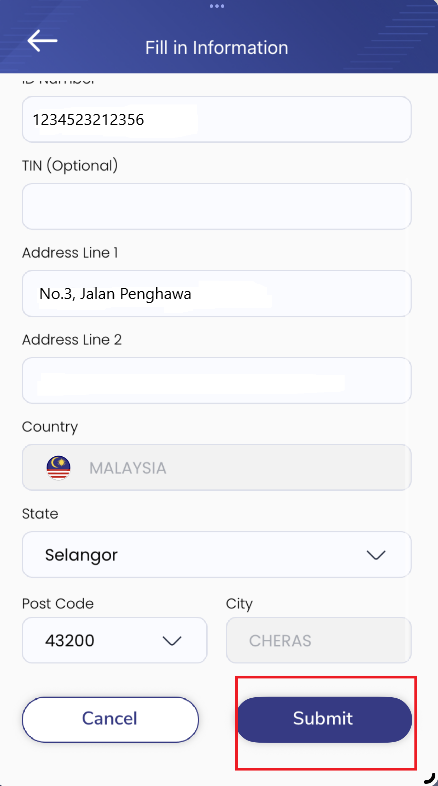
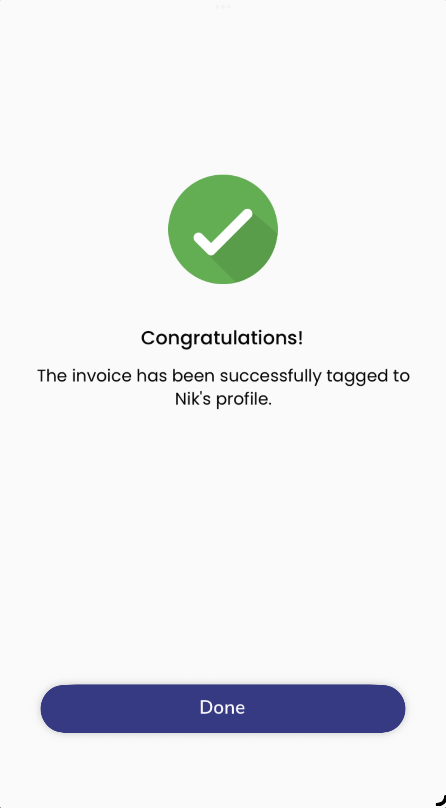
Fill in all required information in the fields. Press Submit, then Done.
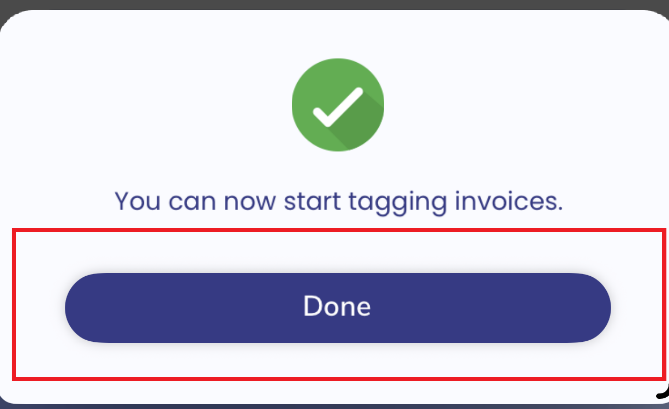
You will be redirected to the Invoice Tagging screen again. Press Confirm to proceed.
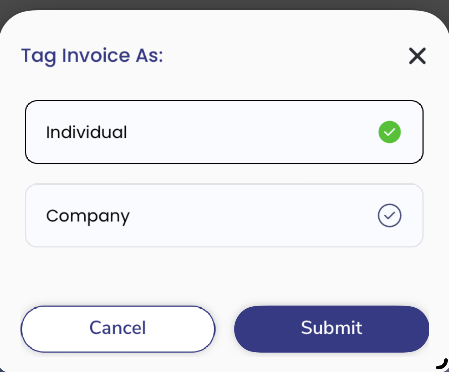
Choose between Individual or Company, then press Submit.
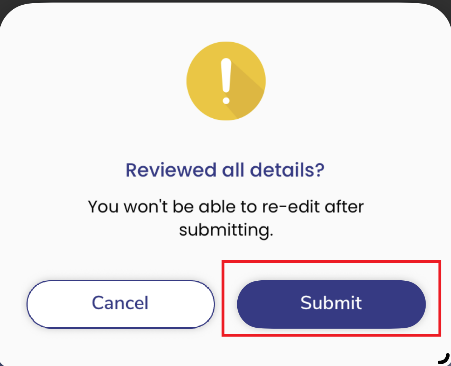
In the confirmation popup, press Submit to complete invoice tagging.
Step 7: Invoice Validation
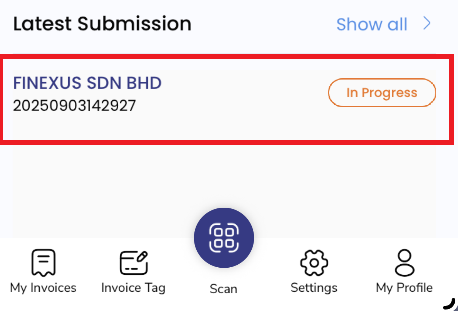
The tagged invoice will be displayed on the main screen. Please wait for the validation process to complete.
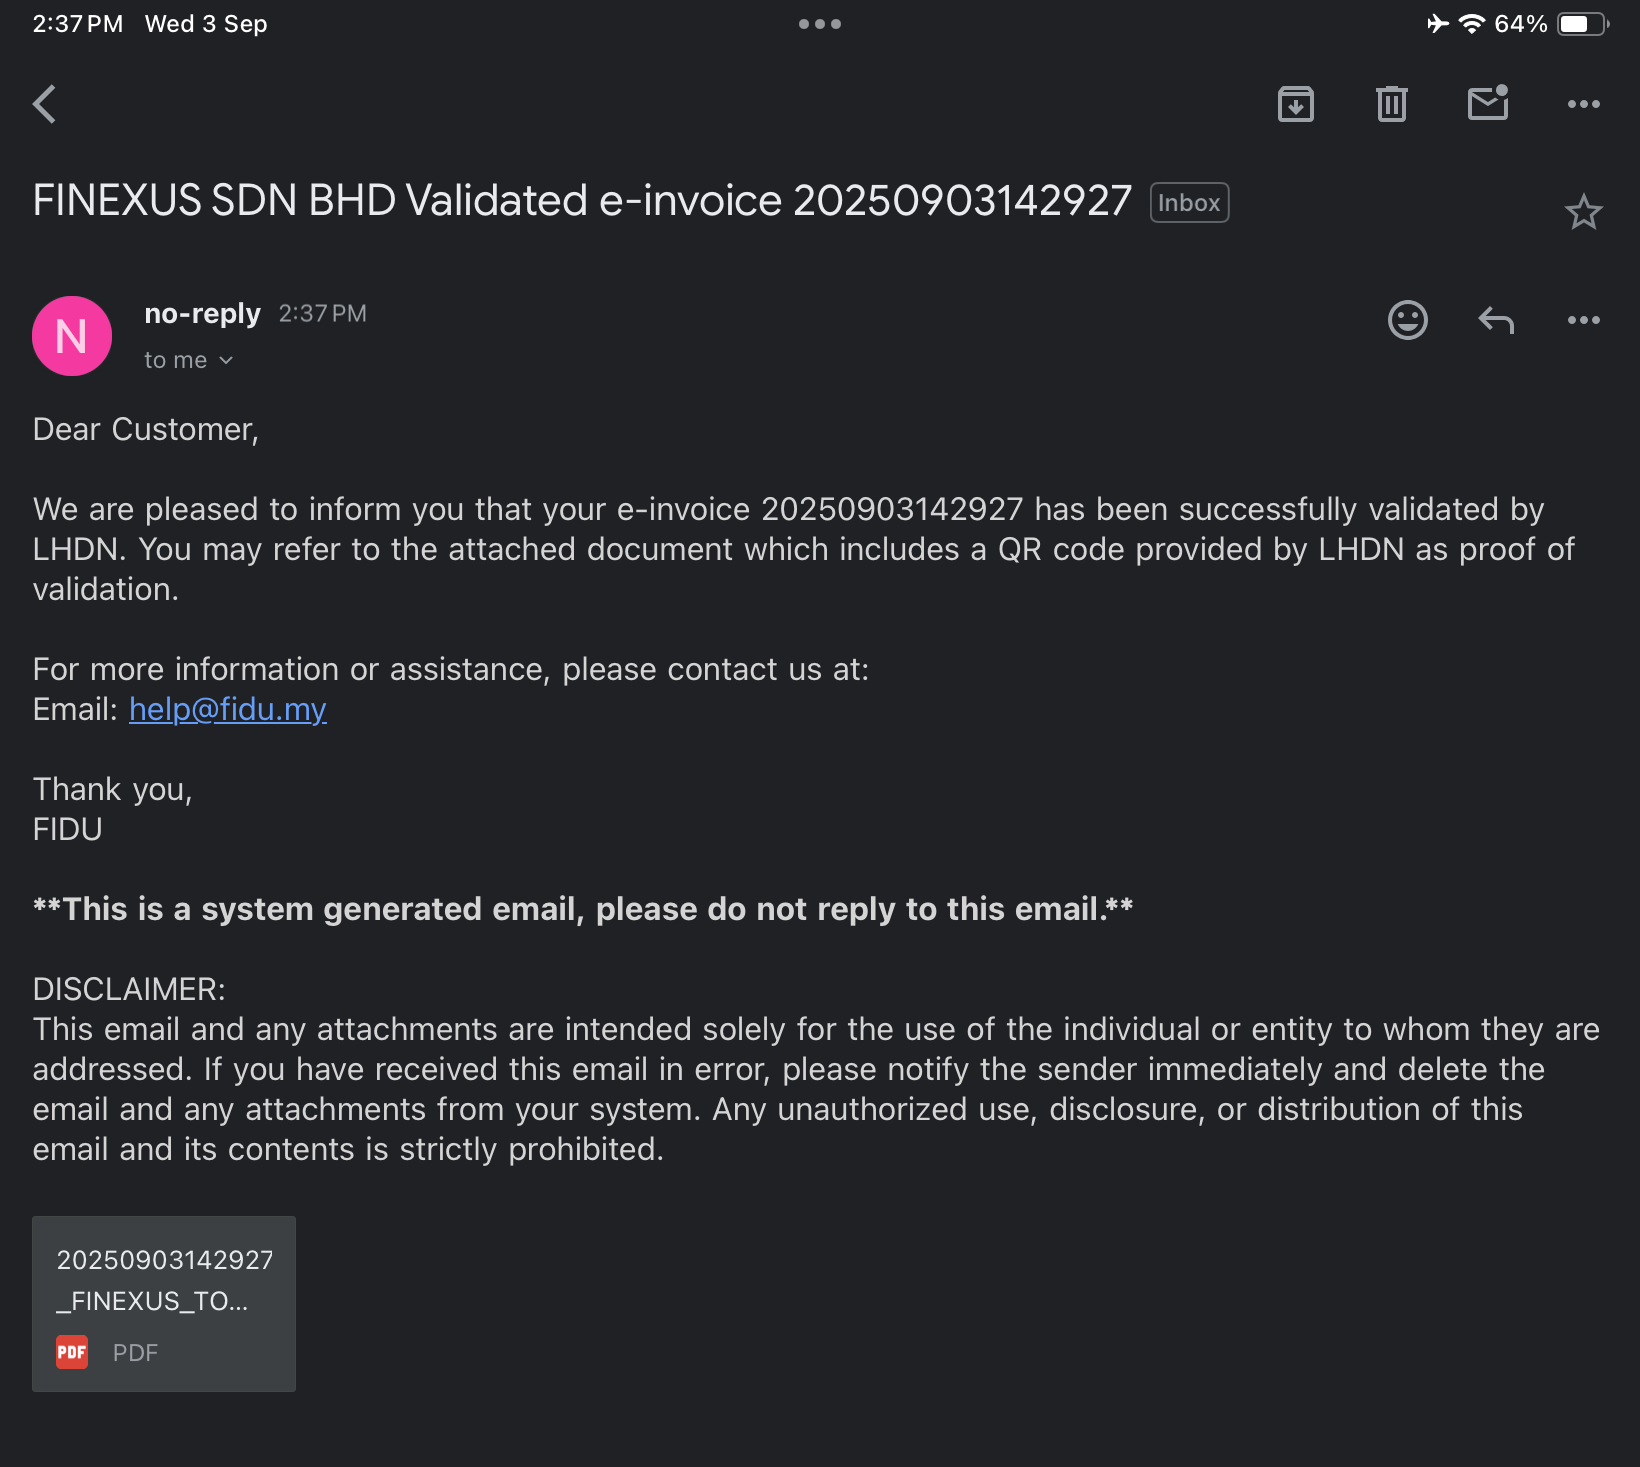
When the invoice is validated, FIDU will notify the user by email and phone notification.

The main screen will show the invoice with a validated status.
You can view the LHDN details by clicking on the invoice.